 Netgear extender clients regularly request that our specialists guide them on the most proficient method to get their WiFi. Despite the fact that we have addressed a similar inquiry ordinarily, still, we have tracked down that numerous clients are deficient with regards to shielding their WiFi from likely dangers. Here, in this aide, we'll shed light on a solitary viewpoint that can assist you with keeping gatecrashers under control and make your WiFi totally secure. You would be pondering is it conceivable to ensure your WiFi just with the execution of one hack? All things considered, yes! Essentially conceal the SSID of your Netgear extender from the organization rundown and get things going. Here's is the means by which to do it.
Conceal SSID of Your Extender to Protect it From Leeches Need to make your Netgear WiFi extender network safer? Assuming this is the case, stowing away your extender's SSID from broadcasting can help you incredibly. Check underneath the means disclosing how to conceal Netgear_ext SSID from broadcasting. · Before you start, ensure your extender is associated with your home WiFi switch in a legitimate way. · Turn on your PC and open an internet browser on it. · Note: Make sure the internet browser you use is running the most recent programming variant and isn't conveying any perusing garbage like reserve and treats. ·Once done, type mywifiext.net web address into the URL field. Assuming you are utilizing a MAC-upheld machine, consider utilizing mywifiext neighborhood all things being equal. · In the wake of entering the default web address into its individual field, press the Enter key to get to the extender login page. · You, then, at that point, need to fill in your login subtleties into the username and secret phrase fields. On the off chance that the Netgear extender login subtleties have been modified by you, consider utilizing the refreshed certifications to keep away from any issue with the course of extender login. · Hitting the Log In alternative will divert you to the Netgear Extender Setup arrangement wizard. · Once there, go to the settings segment of your WiFi gadget and find the Administration choice. · There you will discover the 'Broadcast this Network Name (SSID)' choice. · To conceal the SSID of your extender, uncheck this alternative. · On the off chance that your extender upholds both 2.4GHz and 5GHz WiFi organizations, consider impairing the choice for the two organizations. · When you complete the above-recorded advances, click Save to roll out the improvements successful. · Presently, open the WiFi settings on your PC or cell phone to affirm on the off chance that you have accomplished with the most common way of stowing away your extender's SSID or not. Note: Just on the off chance that you need to unhide the SSID of your extender, you can do this by checking the 'Empower SSID Broadcast' choice with the execution of similar advances. This is concerning how you can conceal the SSID of your Netgear WiFi range extender. This is the manual cycle, which can be selected by you for making your Netgear extender's WiFi name stowed away from adjacent gadgets. Be that as it may, to get accomplishment with the interaction, ensure you follow every one of the means accurately. Wrapping Up When you complete the course of Netgear extender arrangement for any model you own, its organization will be noticeable to other people. Along these lines, anybody inside the scope of your organization will actually want to see it and might gain admittance to your organization by hacking it. In this way, assuming you need to keep your WiFi secure from such fuming, it is prescribed to conceal the SSID of your extender immediately. This will quit broadcasting the WiFi network name of your extender and shield it from web criminals. Despite the fact that concealing the SSID of a Netgear extender isn't super complicated, in the event you need any assistance, go ahead and approach our specialized specialists for fast help.
0 Comments
 The Netgear Range Extender is recommended for consumers who are experiencing dead zones or poor Wi-Fi connection issues. Users can connect additional devices and enjoy fast Wi-Fi speeds in every area of their home or office with the help of the Netgear Range Extender. Therefore, after successfully setting up the range extender, the users can access the Netgear Extender Login account to make changes to the extender’s settings.
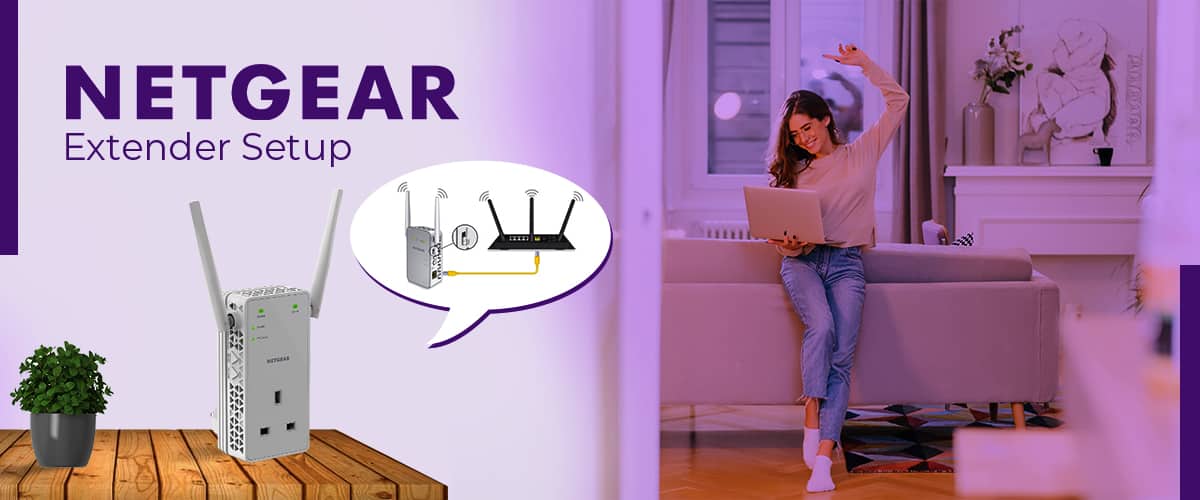
The Netgear range extenders increase the existing network range and give high-speed; thus, they are perfect for home and office use. Therefore, to get the fastest Wi-Fi speed, users should follow the steps outlined below to set up their Netgear Extender. So, to setup the Netgear range extender, the users can access the official Mywifiext page. The Netgear Range Extender guarantees a fast network speed while also resolving poor internet connection issues. However, users must install and complete the Netgear Extender Setup process to enjoy a high-speed internet connection throughout the home or office. Netgear Range Extenders are electronic devices that extend the range of an existing Wi-Fi network and increase network speed throughout the home or office. Therefore, users who have dead zone troubles at home or the workplace can choose the Netgear Range Extender. Thus, they are designed to provide increased speed, network capacity, and coverage. Furthermore, once the users are done with the Netgear Extender Setup procedure, they can access their Netgear Extender Login account to make changes in the network settings and much more. Benefits of Netgear ExtenderThe Netgear Range Extender is a great way to boost Wi-Fi bandwidth. Thus, all users are suggested to check the range extender’s advantages provided below. However, to fully utilize the range extender, users must finish the Netgear extender setup method.
Users can access their Netgear Extender Login account using the IP address 192.168.1.250. Thus, provided below are the steps for the Netgear login. So, the users are advised to follow the procedures listed below to log in to 192.168.1.250 rapidly.
 Netgear extender is one of the best networking devices that expands the range of the wireless router. It gets connected to the router and improves the strength of the wireless signals. Also, it is an absolute device for all users looking for a way to eliminate the dead zone issue within their home or workplace. Therefore, the users looking for a device that extends the range of the router signals should consider using the Netgear range extender. Netgear range extender improves and boosts the range of the existing network. It expands the range of the wireless network and also resolves internet connection-related problems. However, the users will have to perform the Netgear Extender Setup procedure to enjoy high-speed internet.
The Netgear range extender builds a strong wireless connection between the router and the device. Therefore, once a strong connection builds up, the users can stream their favorite content online and perform other online activities in a hassle-free manner. But, to make the most of the Netgear range extender, the users will have to perform the Netgear Extender Setup procedure. Thus, the users are advised to read the instructions provided below and apply the same to accomplish the setup procedure. Benefits of Netgear ExtenderNetgear Range Extender is an excellent way to increase the bandwidth of Wi-Fi. So, all users are suggested to check out the benefits of the range extender. However, the users must execute the Netgear Extender Setup procedure to take complete benefits of the range extender.
Netgear Extender Setup ProcedureUsers having trouble setting up their Netgear range Extender are advised to follow the instructions outlined below to simply setup the Netgear range extender.
Netgear Extender Setup IssuesCommonly, the users come across issues while performing the Netgear Extender Setup procedure. So, mentioned below are some of the very common problems related to the Netgear range extender.
|
AuthorWrite something about yourself. No need to be fancy, just an overview. Archives
October 2021
Categories |
 RSS Feed
